 |
 | | | Compost in a Cup
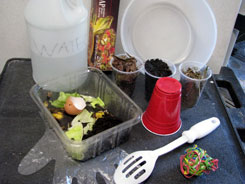
 - 16 oz. cup with holes in bottom
- Pair of gloves
- Large bowl
- Organic compostable items
- Leaves, grass clippings, vegetable scraps, fruit scraps, coffee
grinds, etc.
- 1/4 cup soil or dirt
- 1-2 teaspoons of water
- Piece of plastic wrap
- Rubber band
- Large plastic spoon

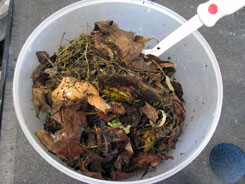
Before beginning this experiment, you will need to collect the organic items you plan on composting. There are many different materials you can add to your compost cup. As a general rule of thumb, anything that comes from a plant or tree is good to include. Some things you do not want to include are meat, dairy products, and seafood. Nobody likes the odor of month old salmon lingering around! Once you have collected your organic items, place them in a large bowl, add 1/4 cup of dirt and 1-2 teaspoons of water, and mix.
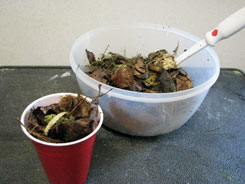
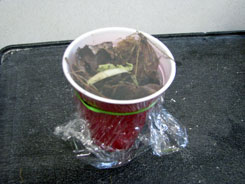
Next, take your 16 oz. cup with holes in the bottom, and a pair of gloves. Using the large plastic spoon, take 2 scoops from your bowl and place them into your cup. Now, take your piece of plastic wrap and place it on top of your cup. Secure it around the rim of the cup with the rubber band. Make sure the plastic wrap is nice and tight on the cup and the rubber band is secure.
Compost piles need sun, shade, water and movement so put your cup in a window that gets a good amount of sun or outside in an area that has exposure to the sun for part of the day. Periodically add 1 teaspoon of water to your cup and give the contents a little "shake". If placed outside, rainwater and a little "shake" will do the trick! The water and movement will assist with the composting process.
The area in which you choose to place your compost cup is important for these reasons. The sun warms the cup of organic material, which promotes increased microbial activity. This is just a fancy way to say that the bacteria and fungi LOVE to live in a warm environment! The shade keeps the compost from becoming too warm, which could lead to loss of essential moisture.
Your compost cup is now complete and the composting process is under way! It's time to let nature do its thing!
You can also experiment using composting containers of different shapes and sizes. You could try a black (or dark) colored container because it will absorb more heat from the sun than a clear or light colored container.

Compost forms naturally nearly everywhere! Leaves drop from trees. Grass clippings are left after mowing the lawn. Plants and animals die. Over time, these organic materials break down or decompose. The rich, dark brown, crumbly, soil-like material that results is called compost.
Tiny living things do much of the work of breaking down organic materials to form compost. These tiny workers are called microorganisms and include such things as bacteria and fungi. Animals living in the soil help microorganisms break down organic materials. Worms and pill bugs are examples of organisms that help change organic waste into compost.
The organic materials provide many of the nutrients that plants need for growth and activity. Eventually, these nutrients are returned to the soil, to be used again by trees, grass, and other plants. This is nature's way of composting and recycling!
The compost that you make at your home or school can be used as mulch or mixed into the soil. Compost is one of nature's best mulches and soil amendments. By composting and mulching, you can save money by reducing your fertilizer and landscaping bills, lowering your water bill, and spending less on trash pickups or disposal.
| | 


| |
|  |
|